
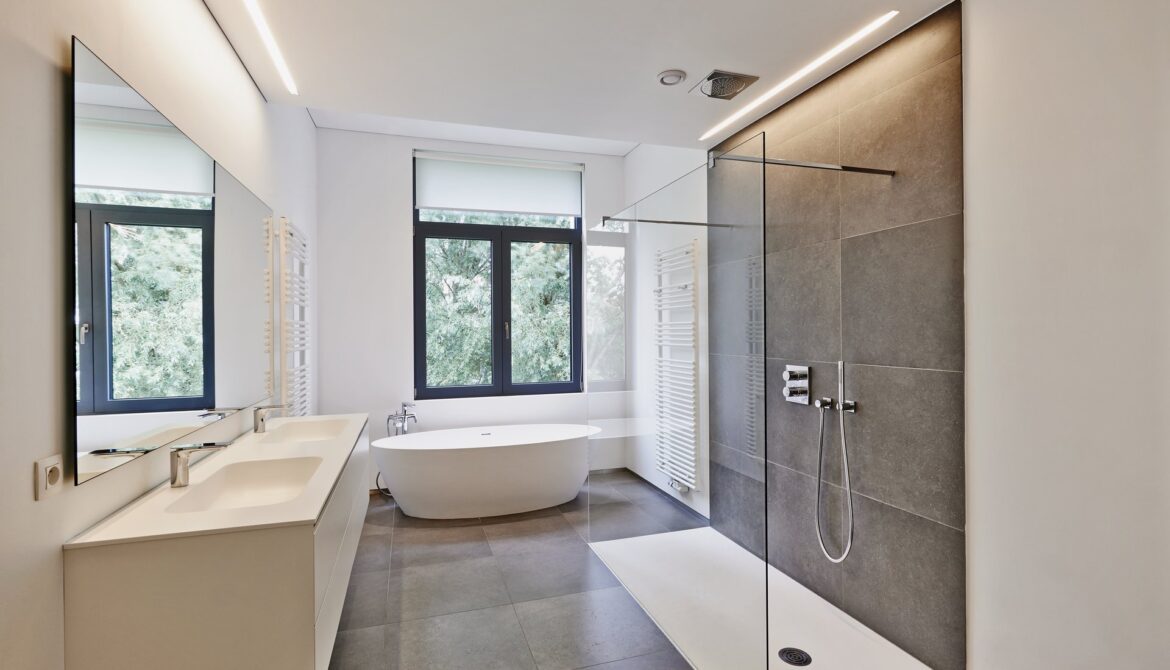
A wet room is a fully waterproofed (tanked) room with a floor-level shower and an unbroken floor. Good design rests on four things: a slip-resistant floor (R10–R12), drainage with a continuous fall, flawless tanking and effective ventilation. Site-built rooms carry the tanking risk on site; a prefabricated pod moves it into the factory.
What is a wet room (and what’s the point)?
In a wet room, the whole bathroom is waterproofed, not just the shower area. The shower sits at floor level with no raised tray, and the floor and lower walls form one continuous, sealed surface. “Tanked” refers to the waterproof membrane that wraps the floor and walls like a tank. You will also see the room called a wetroom, a level-access shower room or a walk-in shower room.
The point is mostly practical. With no step or tray lip, the room is easier to enter, easier to clean and easier to adapt for someone with limited mobility. It can also make a small room feel larger, because no enclosure breaks up the floor plan.
There is a trade-off. Every part of the room has to cope with water, so floor finish, falls, drain, membrane and ventilation become structural decisions rather than finishing touches. Get them right and the room is tough. Get them wrong and it leaks into the structure below.
Wet room vs walk-in shower vs tray
People often confuse the three options. A wet room waterproofs the entire room. A walk-in shower is an enclosure, usually a glass screen, that keeps water in one zone. A low-profile or flush stone-resin tray gives near level-access entry without tanking everything, which is why it is sometimes called a semi-wet room. According to Grand Designs, the tray route is cheaper than full tanking.
| Feature | Wet room | Walk-in shower | Low-profile or flush tray (semi-wet room) |
|---|---|---|---|
| Waterproofing | Whole room tanked | Enclosure area, depending on build | Tray and surrounding area |
| Shower threshold | Level with the floor | Low or level, depending on the base | Near level, with a shallow or flush tray |
| Floor | Continuous, sloped to the drain | Standard bathroom floor outside the enclosure | Standard floor outside the tray |
| Enclosure | Optional; a single glass panel is common | Glass screen or panel | Screen or panel |
| Main risk | Failure of the tanking layer | Water escaping beyond the enclosure | Tray-to-wall junctions |
| Cost position | Highest of the three on site-built jobs | No reliable public comparison | Lower than tanking, according to Grand Designs |
The brief usually decides. A full wet room suits a new build or a full refurbishment, where the floor can be prepared properly. A tray-based semi-wet room suits a retrofit, where lifting the floor is difficult.
Layout and design styles
Layout is mostly about water: where it lands, where it drains and which surfaces it reaches. Style sits on top. Four directions come up most often.
Minimalist
The minimalist wet room drops the enclosure and uses large-format porcelain with as few grout lines as possible. The result is calm and uninterrupted. But there is a catch: Self Build notes that mosaic, with its extra grout joints, grips better underfoot. A designer has to balance visual quiet against traction, and on the shower floor traction should win.
Scandi and organic
Timber, stone basins, warm colours and matt fittings define this style. It works in a wet room as long as the timber stays out of the wet zone. Plumbworld warns that wood or laminate on a wet room floor will distort. Keep timber for shelving, benches away from the spray or ceiling details, and let stone or porcelain take the floor.
Industrial
Dark slate, concrete-effect surfaces and black grid or fluted glass set the industrial look. These finishes tolerate water well and hide marks. Limescale does show on dark surfaces, though, so a squeegee and regular cleaning stay on the job list.
Freestanding bath in the wet zone
A freestanding bath can sit inside a wet room, with the tanked floor catching splashes and overflow. It needs more floor area than a shower-only room, so it suits larger bathrooms and en suites with space to spare. Position it so the drain and its fall stay clear.
Flooring: what to put on the floor of a wet room
The floor must be waterproof, durable and slip-resistant when wet. Porcelain, stone mosaics and luxury vinyl tile (LVT) are the usual choices. Porcelain is dense and easy to clean, while stone mosaics add grip through their many joints. LVT is warmer underfoot and quicker to lay, provided the product is rated for wet areas and the substrate is properly prepared.
Slip resistance is measured in two ways. Self Build points to R10–R12 ratings for wet room floors, while Absolute cites a pendulum test value (PTV) of 36 or higher. The two come from different test methods, so check which one a product data sheet quotes.
| Measure | Value cited for wet rooms | Source |
|---|---|---|
| R-rating (ramp test) | R10–R12 | Self Build |
| PTV (pendulum test value) | 36 or higher | Absolute |
Materials to avoid are those that absorb water or move with it. Solid timber and laminate fall into this group, as Plumbworld warns. Smooth, polished tile is a poor choice for the shower floor too, whatever its other merits.
Grout deserves attention. Epoxy grout resists water and staining better than cement-based grout, so it is often specified for wet room floors and shower walls. Underfloor heating helps as well: it dries the floor faster after use, which cuts slip risk and limits damp.
Drainage and falls
Water has to reach the drain, so the floor needs a fall. The drain is either central or linear. A central drain sits in the middle of the shower area, with the floor sloping inwards from all sides. A linear (channel) drain sits against a wall, so the floor slopes in one direction only. According to the guides, a linear drain clears water quickly and suits large-format tiles, which are easier to cut for a single plane.
The recommended gradient and the relevant standards for waterproofing and tiling are widely quoted but vary between sources. Confirm the figure before it goes into a specification. A fall of roughly 1:60 to 1:40 (about 17 to 25 mm per metre) is commonly quoted, and BS 5385-4 covers tiling in wet conditions.
The sub-floor matters as much as the drain. A concrete floor can be formed with falls in a screed or a tray former. A timber floor on joists needs checking for stiffness and for how the falls will be built up, because later deflection or movement will crack tile and stress the membrane. Settle pipework routes, drain depth and available floor build-up before fixing the layout.
Pressure is easy to miss. Some shower heads need a minimum of 2 bar, and a wet room built around a large rain head can disappoint on a weak supply. Check the supply against the manufacturer’s data before ordering.
Waterproofing (tanking): where wet rooms fail
Every guide agrees on one point: tanking is where wet rooms succeed or fail. The membrane must run continuously across the floor and up the walls, with sealed junctions at corners, around the drain and wherever pipes pass through. A pinhole at a corner or a poorly bonded drain flange can let water into the structure for months before anyone sees a stain.
Site tanking is a craft task done in a working building, often at the mercy of other trades. Sequence matters: prepare the substrate, form the falls, apply the membrane, let it cure, test it and only then tile. Skipping the cure or the test is the usual route to failure. None of the sources reviewed offers a warranty framework for the tanking itself, so responsibility often falls between the tiler, the plumber and the main contractor.
Design can reduce the risk. Keep penetrations few. Put a decoupling membrane under tile where the substrate may move. Take the drain and membrane from one system, so the components are designed to work together. Where possible, leak-test the tanked area before tiling.
Ventilation, heating and lighting
A wet room pumps a lot of moisture into a small volume of air. Grand Designs cites a minimum extraction rate of 15 l/s with a 15-minute overrun for a new bathroom. Approved Document F volume 1 (dwellings) lists 15 l/s as the intermittent extract rate for a bathroom (Table 1.1). Volume 2, for other buildings, asks for 15 l/s per shower or bath. Whatever the final figure, size the extractor for the room and let it run after showering rather than switching it off with the light.
Heating works alongside ventilation. Underfloor heating dries the floor and keeps the room comfortable without a radiator in the splash zone, and a heated towel rail can sit outside the wet area.
Lighting in or near the shower should be water-rated; the guides mention IP65 downlights for wet zones. Position fittings and switches according to the electrical zones for bathrooms, and have a qualified electrician install and certify the circuit.
How much does a wet room cost?
Cost comes down to a short list: sub-floor work, falls, drain, tanking system, tile and grout, glass, underfloor heating, ventilation, plumbing and labour. Labour takes a large share on site-built rooms because the work is sequential and skilled. A concrete floor is usually simpler to form than a timber one.
A traditional wet room (tiles, tanking and labour) has no reliable public UK price range, so obtain site-specific quotes. A semi-wet room with a flush stone-resin tray costs less than a fully tanked room, according to Grand Designs.
A prefabricated pod is priced differently. Fixtures, finishes, waterproofing and drainage all come in one manufactured unit, so there is no separate tanking or tiling bill. The indicative price of a Domczar wet room pod is quoted per project. The price covers the steel frame, plumbing and electrics, sanitary ware, finishes, waterproofing of the wet zone, lighting and ventilation.
Time counts as well. A site-built room needs several trades in sequence, with curing times between them. Site-built durations vary with the trades and curing times involved. A pod arrives complete and needs only positioning and connection, and Domczar publishes no per-pod installation time.
Small bathroom wet room
A wet room often makes sense in a small bathroom. Removing the tray and enclosure frees floor space, and a single frameless or fluted glass panel can screen the shower without closing the room in. Grand Designs notes that the glass should be toughened to EN 12150-1, at a thickness of 6 to 8 mm.
Recessed niches keep bottles off the floor. Tank them like the rest of the wall and form them with a slight fall so water does not sit inside. In a very small room, put the drain on the wall side and slope the floor one way. Choose a floor finish that can run uninterrupted from the door to the shower.
Hotels and student accommodation, where small rooms repeat many times, follow the same logic at scale. More on that in the guide to bathroom pods for small spaces.
Wet room pods for hotels, student rooms and care
All of this leads to a familiar dilemma. Doing a wet room well on site demands skill, time and careful testing, and doing it in volume multiplies the risk. A third route is the prefabricated pod: a complete bathroom made off site and delivered ready to connect. If the concept is new, the guide on what are bathroom pods covers the basics.
A wet room pod brings the drain, the falls and the waterproof shell into the factory. The tray area is formed as part of the unit, so there are no on-site tanking joints to make or inspect. Domczar manufactures its pods in a plant with a capacity of 9,000 units per year and holds ISO 9001 and ISO 14001 certification.
Confirm several points for any pod specification:
- Built-in gradient and set in the project drawings, so ask for the fall in mm per metre in writing.
- Factory leak testing: pressure and drain-tightness tests, checks of waterproofing and joints, electrical earthing and RCD checks, tests of lighting, ventilation and floor heating, and a geometry check, closed by a final acceptance protocol.
- Dimensions and weight: set per project and limited by the 13.6 × 2.46 m transport trailers; Domczar publishes no standard weights, so request them for crane and floor-loading checks.
- Warranty: not published; agree the terms for the shell and waterproofing in the contract.
Domczar’s 2025 references show the scale involved: a hotel in Dublin (457 units), a hotel in Warsaw (362 units), a hotel in Kołobrzeg (228 units) and student accommodation in Garbsen. Repeated rooms like these are where prefabrication gives the most control over quality, because every unit comes from the same factory process.
Factory conditions help here: the floor structure is formed and the waterproofing applied in the hall, independent of weather, and the unit is tested before dispatch.
Accessible wet room
Level access removes the threshold, which makes a wet room the natural base for accessible bathing. Add-ons tailor it to different users: a fold-down shower seat, grab rails, a drain that handles a wheelchair’s weight and an anti-slip floor rated for wet use. Rails need solid fixing behind the wall lining, so plan blocking or reinforcement before the walls are closed.
Funding may be available. According to Grand Designs, a Disabled Facilities Grant (DFG) can reach £30,000, and a Minor Adaptation is around £1,000. Eligibility and limits depend on the local authority, so check with yours before committing to a design.
Care homes, hospitals and supported housing fit the pod approach too, since the same accessible layout repeats from room to room. Consistent dimensions, grab-rail positions and seat placement make training and maintenance simpler. Domczar’s pod range for these settings includes accessible variants, and the company builds modules for hotels, student housing, care homes and public buildings; a healthcare range is not separately listed.
FAQ
What do you put on the floor of a wet room?
Use a waterproof, slip-resistant surface such as porcelain, stone mosaic or wet-rated LVT, laid over a tanked, sloped substrate. Self Build cites R10–R12 ratings, and Absolute cites a PTV of 36 or higher. Avoid solid timber and laminate, which Plumbworld says will distort in a wet room.
How do I design my small bathroom?
Remove the tray and enclosure, then use a continuous floor finish and a single frameless or fluted glass panel. Place a linear drain against a wall so the floor slopes one way, and add recessed niches instead of shelves. Check water pressure and extraction before ordering fittings.
What’s the point of a wet room?
A wet room gives level access, a seamless floor that is easy to clean and a more open feel in a small room. People with limited mobility benefit too, because there is no tray lip to step over. The cost is that the whole room must be properly waterproofed and ventilated.
What does a wet room cost?
Cost depends on the sub-floor, falls, drain, tanking, finishes and labour. A semi-wet room with a flush stone-resin tray costs less than full tanking, according to Grand Designs. Domczar’s indicative figures are not published; each project is quoted individually.


